14 Set Up a MIDI Control Surface With Multiple Banks
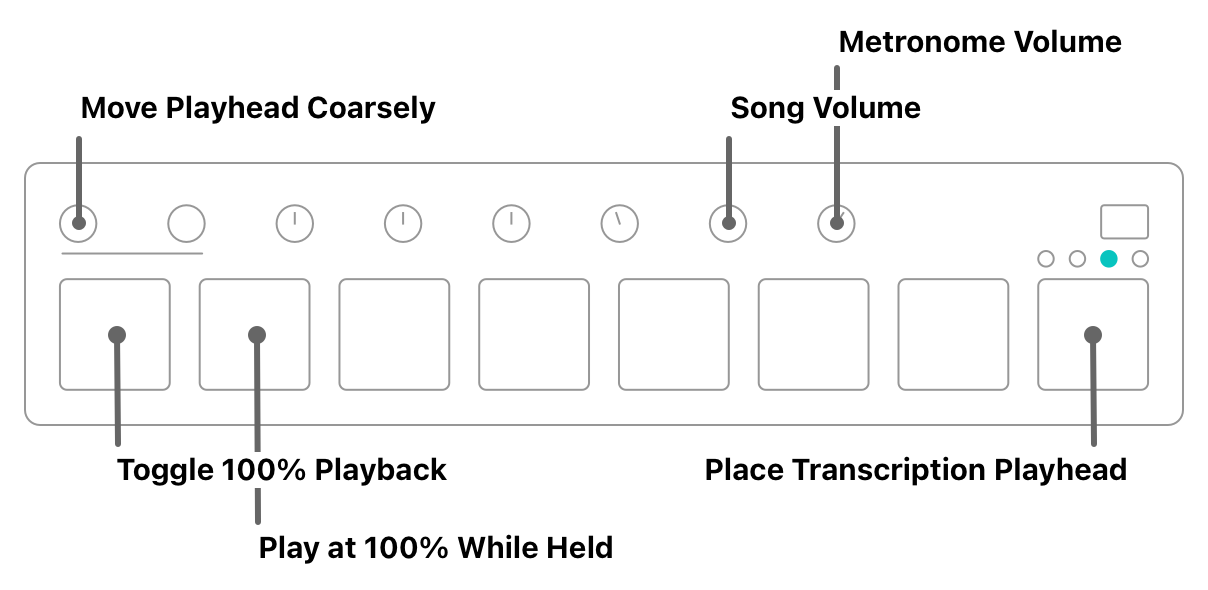
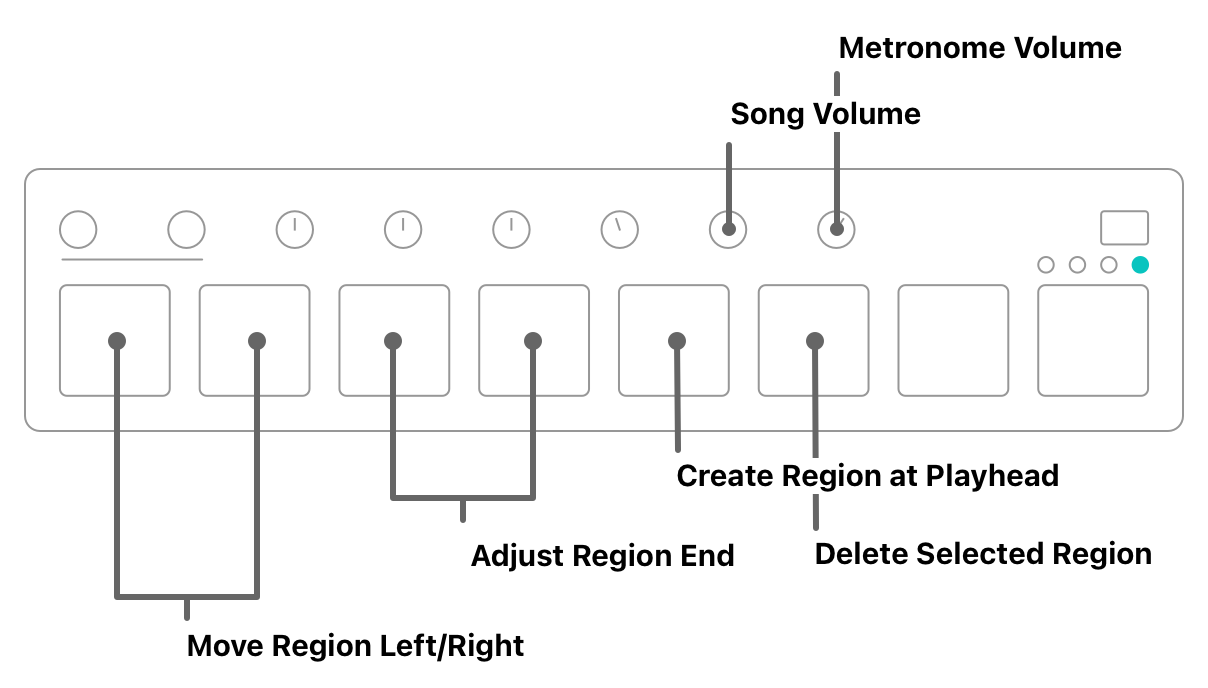
Control surfaces come in many shapes in sizes. Some look like mixing desks, with an array of sliders and knobs, and others are very compact, with only a few knobs and drum pads. Either way, we probably don’t have the same control surface that you do. So for this how-to guide, we’re going to consider the imaginary control surface shown in Figure 14.1.
14.1 The Hardware
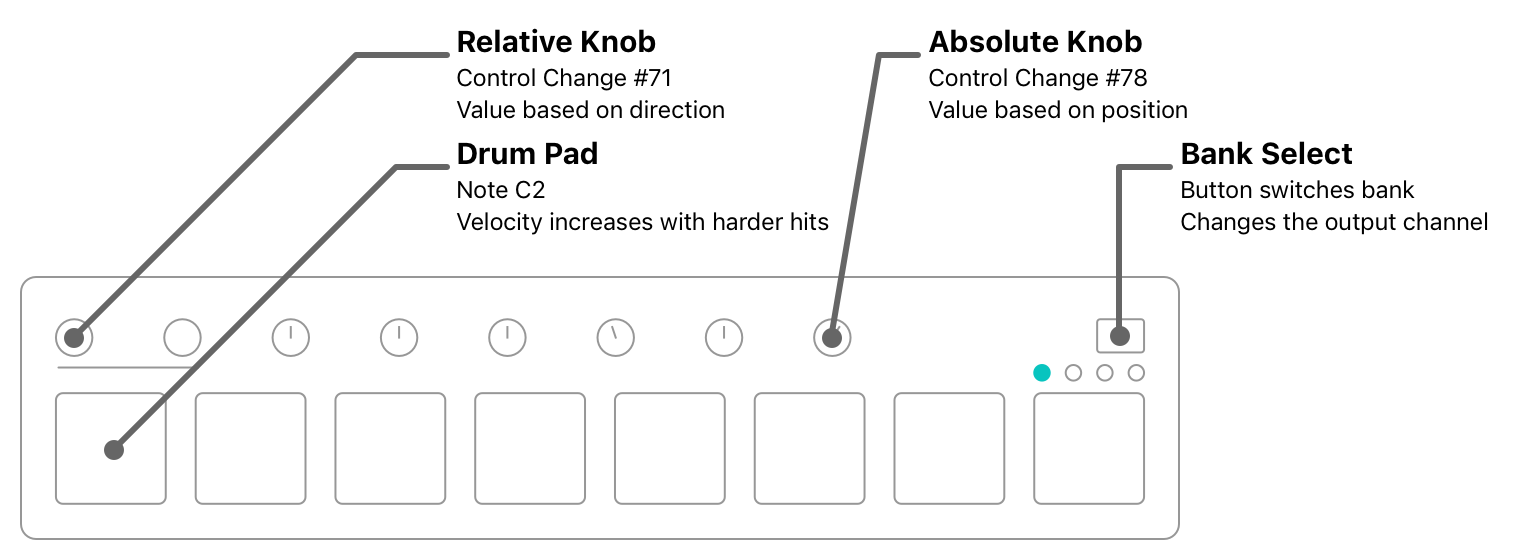
Notice that the first two knobs are relative. To distinguish their behaviour from the other six knobs, they have no indicator lines, and the manufacturer screened a line below them. With relative knobs, the position doesn’t matter—it sends values based on the direction (and speed) of movement. By contrast, a regular knob will always send a value of 0 at the extreme counter-clockwise position, 127 at the opposite end, and 64 in the very middle.
Relative knobs are seldom found on MIDI control surfaces, but they are extremely handy for certain commands in Capo, as you’ll soon see.
Like many modern control surfaces, the manufacturer provides software to configure the MIDI messages sent by each of the banks. For example, you might want the drum pads to send specific ControlChange or ProgramChange messages to work with physical MIDI equipment. But if you use Capo, you’ll rarely need to adjust these settings because—unlike physical hardware—Capo can be configured to respond to whatever your MIDI controller is sending. So for this example, we’re going to make up an imaginary factory configuration, and discuss how you might want to bind these controls in Capo.
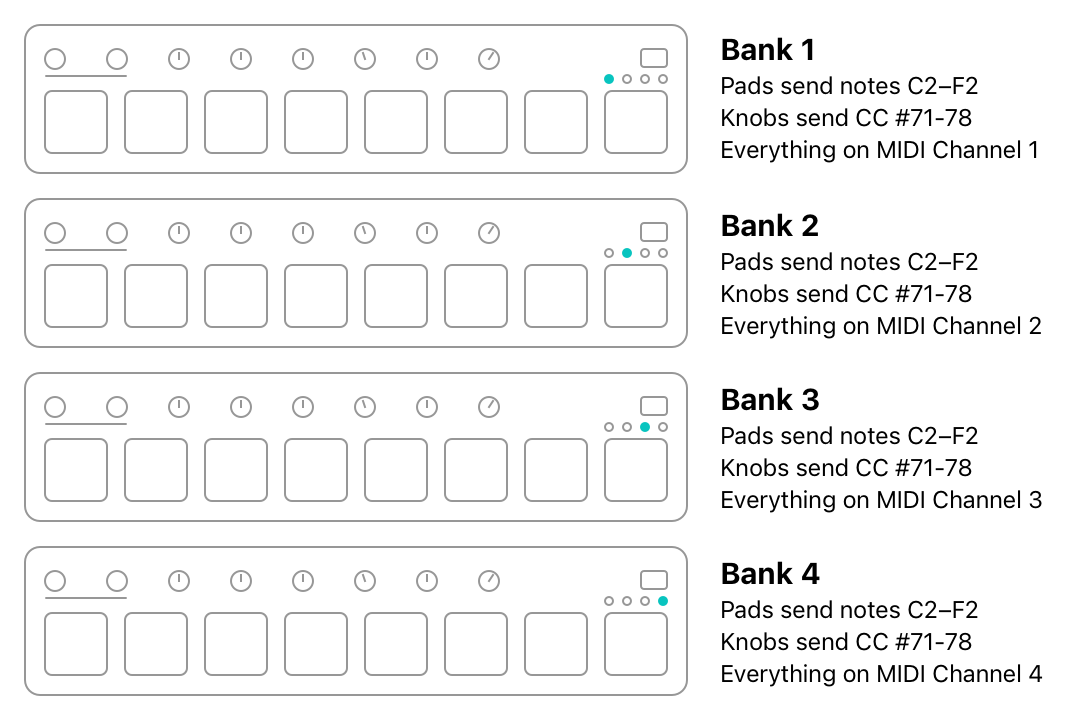
In the factory configuration, each of the eight pads sends a NoteOn or NoteOff message in the same note range of C2–F2. The knobs all send control change messages from #71–78. When the bank is switched, the control surface sends the same messages, only on a different MIDI channel.
If we want to use this factory configuration to its fullest, we can work with a total of 32 drum pads and 32 knobs. But this is a lot to keep track of, and we probably don’t need every single control to do what we want. So we’re going to use banks to keep everything arranged, and spread the controls out. We’re also going to make sure that the last two knobs always do the same thing, in every bank.
14.2 An Example Configuration Using Banks for Organization
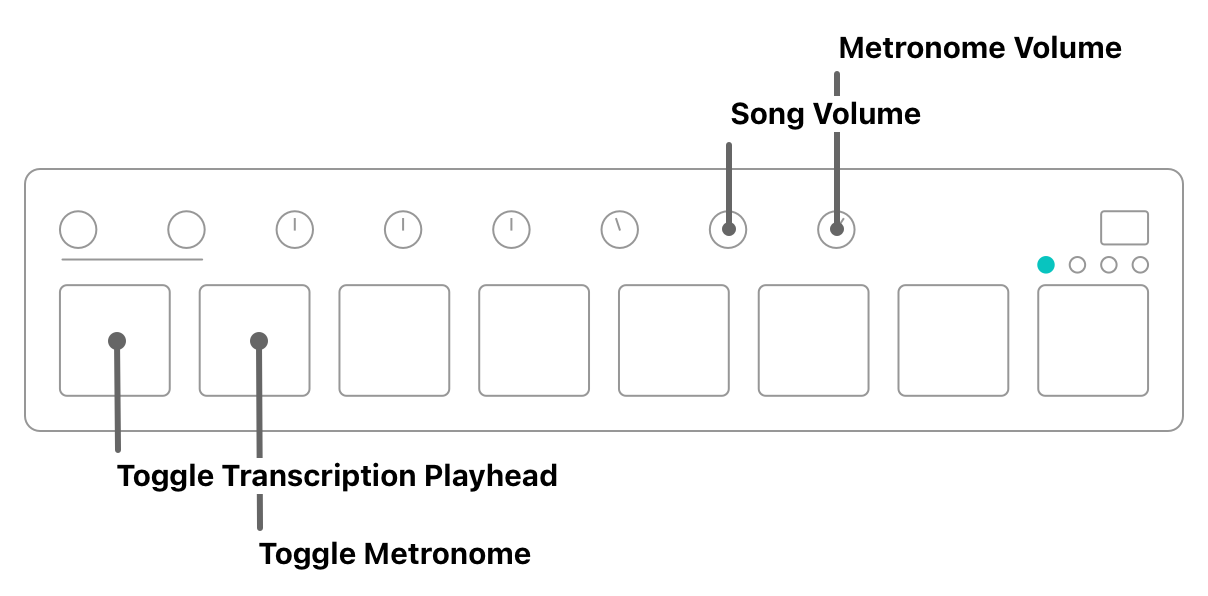
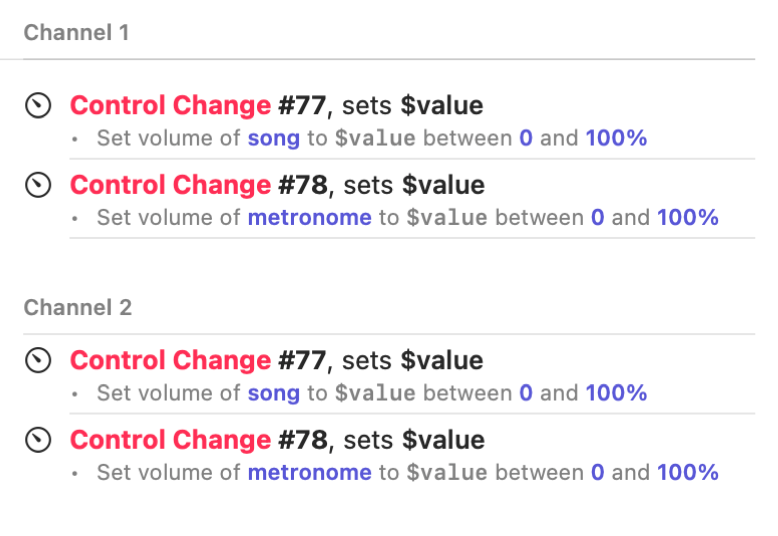
With this configuration in mind, we now have to set up Capo accordingly. Because we are dealing with many possible controls, we’re going to describe their configuration in groups. First we’ll start with the two volume knobs.
14.3 Volume Knobs
Recall that each bank will send the same messages, but on different MIDI channels. In this case, the last two knobs are sending Control Change messages for #77–78, but bank 1 sends them on channel 1, bank 2 on channel 2, and so on. We could define these bindings separately. Here are the bindings for only the first two banks:
But we don’t like to repeat ourselves, so we’ll define the triggers so they accept messages on any channel.
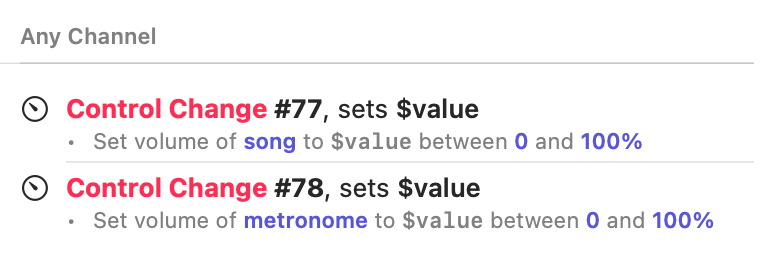
Using this configuration, the last two knobs will always control the volume of the song and metronome, no matter what bank is selected on the device.
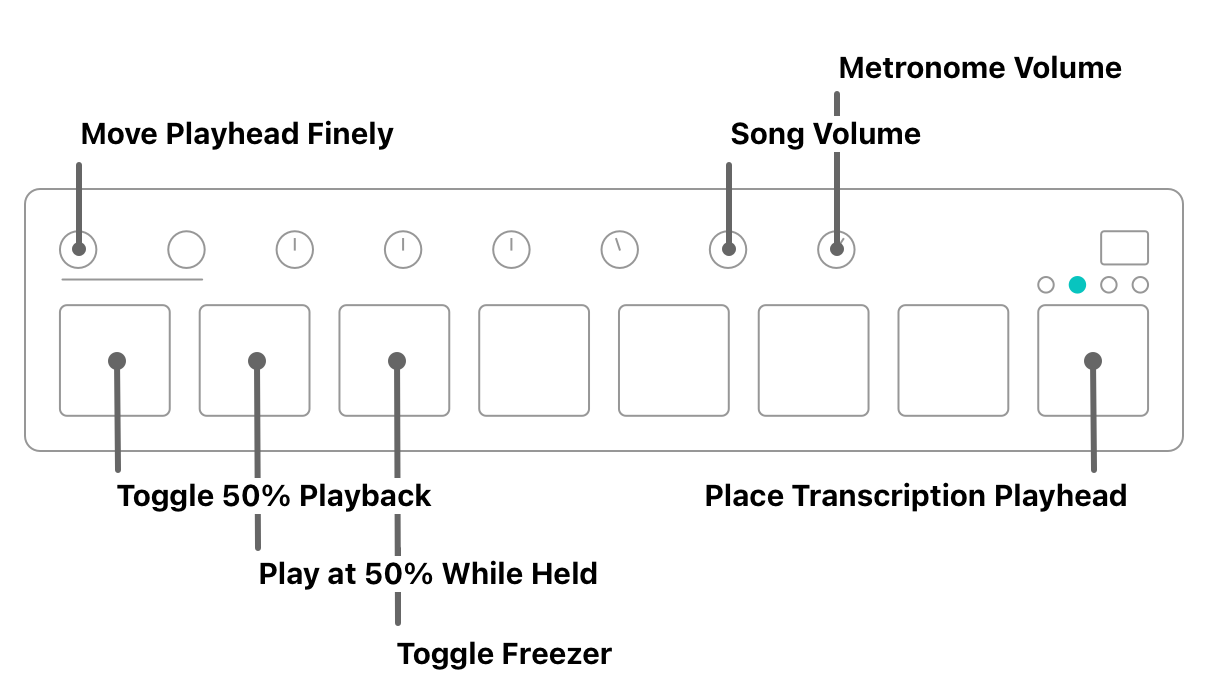
14.4 Playback Controls With Preset Speeds
There are two kinds of controls for each of the speeds: one that toggles playback at a set speed, and one that plays only while the key is held down. The interesting thing about these bindings is that most will send two commands when they are triggered—one to set the speed, and another to start or toggle playback.
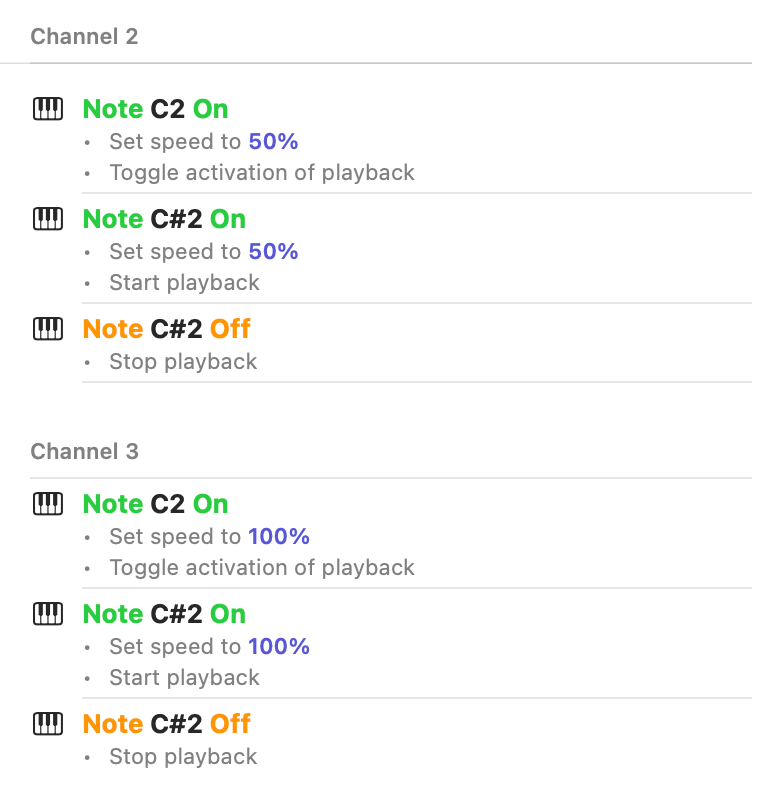
Unlike our MIDI foot pedal example, our drum pads send NoteOn and NoteOff messages; so we can’t use variable values to set these up using a single binding.
With this configuration, the first pad will trigger playback at 50% speed in bank 2, and 100% speed in bank 3. The second pad plays audio at its preset speed only while the pad is held down, which is especially useful when the transcription playhead is active.
14.5 Movement Using Relative Knobs
In the second and third banks, we use the first relative knob to move the playhead position. In the second bank, this fine adjustment combined with the audio freezer allows us to scrub over the song’s audio, and we can listen for individual notes that we want to play on the instrument. Here’s what the configuration looks like.
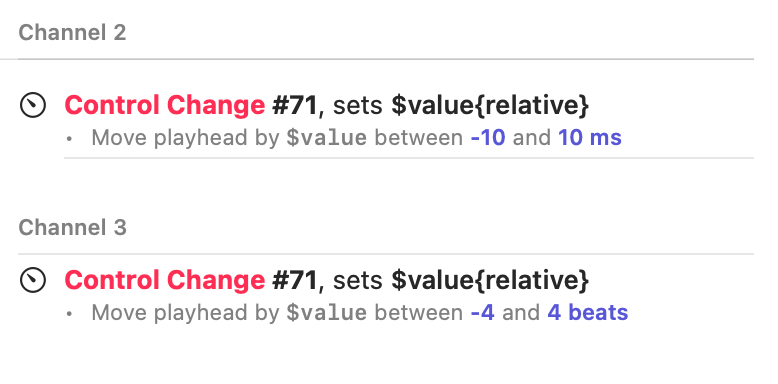
When the knob is activated on the second bank, the playhead is moved by somewhere between -10 and 10 milliseconds, which is a very fine adjustment. Depending on your own MIDI hardware, you might want to play with this range until it feels right to use. On the third bank, the playhead will move much more quickly, aligned with the beat grid, as you turn the knob.