21 The Structure Song View
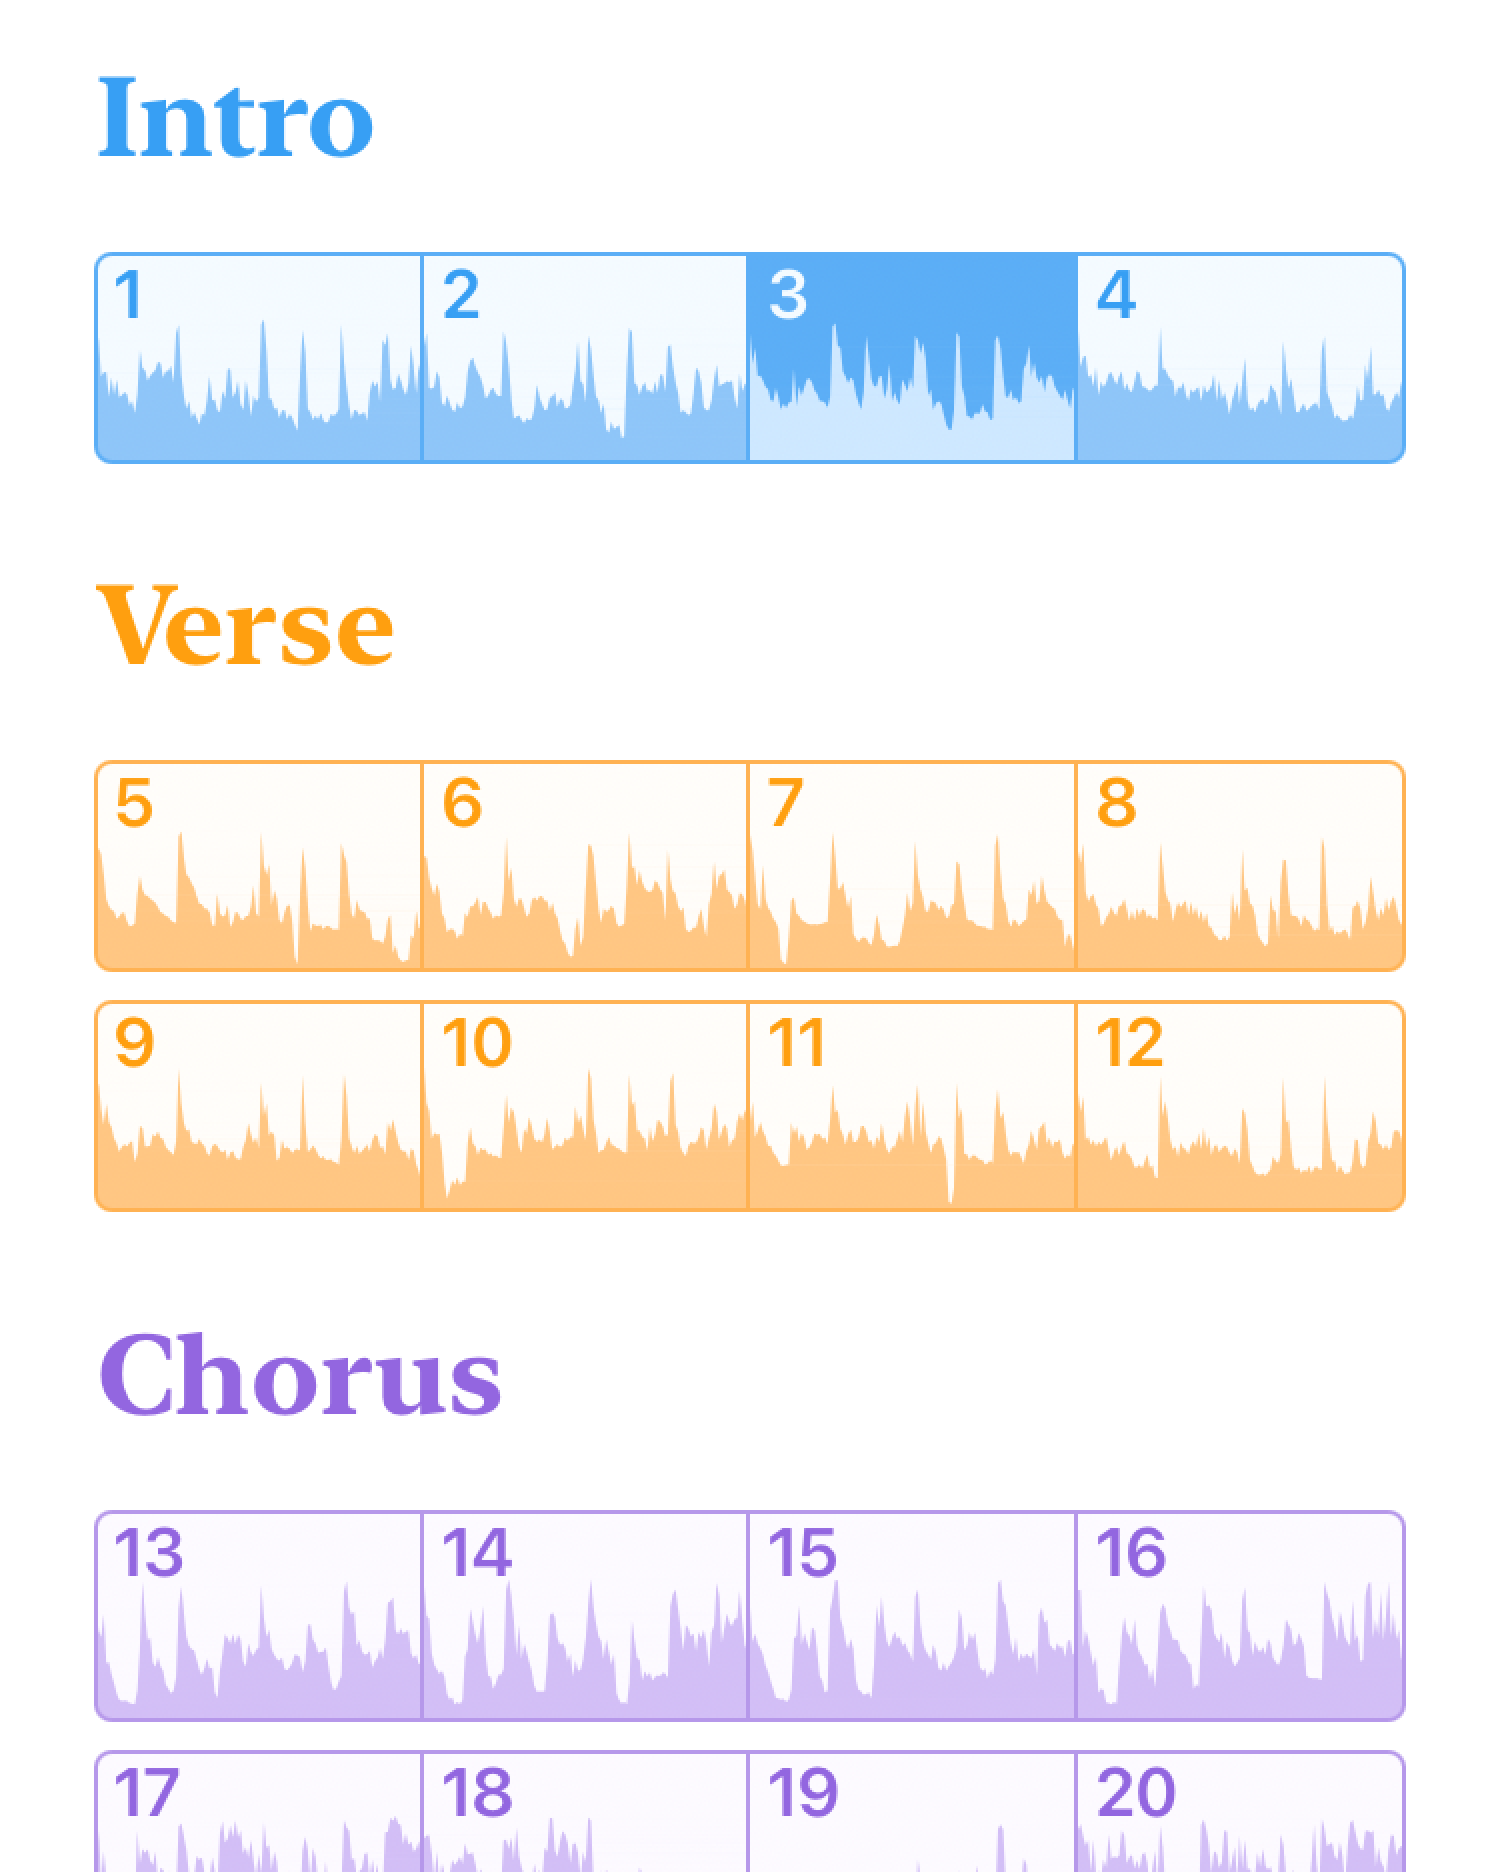
The structure song view (Figure 21.1) gives you an overview of the song’s sections and bars. In this song view, you’ll be able to make changes to the song’s beat grid and then choose the bars where the song’s Chorus, Bridge, and other sections begin.
All the changes you make in this view will update the display in the other song views. For example, the changes you make to the beat grid will be reflected in the timeline shown in the Practice song view, and your sections will appear in the Chords song view. On the Mac, these will also impact the printed lead sheet output.
To show the Structure song view:
- Click the song view selector at the leftmost corner of the toolbar
- Choose “Structure” from the pop-up menu
To show the Structure song view:
- Tap the song view selector at the very top of the project view
- Choose “STRUCTURE” from the pop-up menu
21.1 Replacing Bars and Beats
You can replace Capo’s detected bar and beat locations by listening to the song and tapping the first beat of every bar. This process happens in real time, and takes exactly as long as the song takes to play. But you don’t have to tap out the whole song at once. For example, you can “touch up” the beat grid in the first verse while you work on it, and then wait to fix up the chorus when you move on to learning that part.
To replace the detected bars and beats:
- Tap the bar before the first one you wish to replace, or press ⌘← on your keyboard to move to the start of the recording
- Click the record downbeats button in the toolbar
- Set the number of beats per bar, if needed
- Click the Start Recording button
- When you hear the downbeat, click in the waveform area to record that location
- After you’re done, click the Stop Recording button to commit the new bar locations
To replace the detected bars and beats:
- Ensure the Bars control strip is visible
- Set the location where you wish to start recording bars by tapping the bar before the first one you wish to replace, or by seeking to the start of the song.
- Tap the record downbeats button
- Set the number of beats per bar, if needed
- Tap the Start Recording button
- Tap in the waveform area to mark the start of each bar that you hear during playback
- After you’re done, tap or click the Stop Recording button to commit the new bar locations
If you messed up, you can repeat the recording again by pressing Start Recording. It will always start from the same point, and will replace all of the beats in the playback range.
If the number of beats is not consistent (e.g., bars of 3 beats followed by bars of 2 beats), set the value of the most common number of beats per bar.
21.2 Adjusting Bar Locations
It’s okay if you tap a little bit early or late when you’re recording the downbeats. Fortunately, you can easily nudge the start of the bar to fix these mistakes.
To adjust the start location of a bar:
- Click to select the bar that needs to be adjusted
- Either click the edit bar location button in the toolbar, or right-click the bar you want to edit and choose “Edit Bar Location”
- Drag the adjustment playhead to select the new start point for the bar. Capo will turn on the Audio Freezer to help you listen for the point where the bar starts.
To adjust the start location of a bar:
- Ensure the BEATS control strip is visible
- Tap to select the bar that needs to be adjusted
- Tap or click the edit bar location button in the control strip, or long-press on the bar you want to edit and choose “Edit Bar Location”
- Drag the adjustment playhead to select the new start point for the bar. Capo uses its built-in Audio Freezer engine to help you listen for the point where the bar starts.
21.3 Edit the Beat Counts
Not all songs have a consistent time signature throughout. Some will alternate between 3 and 4 beats per bar, and some will occasionally drop a beat or two temporarily. Fortunately Capo will let you deal with these songs pretty easily.
For each bar that is incorrectly counted, select it and then edit the beat count.
To set the number of beats in a bar:
- Click to select the bar that contains the wrong number of beats
- Click the edit beat count button in the toolbar
- Enter the number of beats that are in the bar
- Click outside the popover to apply the change
To set the number of beats in a bar:
- Ensure the BEATS control strip is visible
- Tap on the bar with the wrong number of beats to select it
- Tap the edit beat count button in the BEATS control strip
- Enter the number of beats that are in the bar
- Tap “Apply” to save your changes
21.4 Creating Sections
To create a new section, do one of the following:
- Click on the first bar in the section, then click the create section button in the toolbar
- Right-click the first bar in the section, and choose “Create New Section” from the menu
To create a new section, do one of the following:
- Tap on the first bar in the section to select it, then tap the create section button in the SECTIONS control strip
- Long-press on the first bar in the section, and choose “Create New Section” from the menu
21.5 Editing Sections
To change the title and color of a section:
- Click on the title of the section you’d like to edit
- Click the section’s title again to show the editor
- Enter a new title for the section
- Choose a new color for the section
- Click outside the popover to apply your changes
To delete a section:
- Click the title of the section you’d like to delete
- Press the ⌫ key to delete it
To change the title and color of a section:
- Tap on the title of the section you’d like to edit
- Tap the section’s title again to show the editor
- Enter a new title for the section
- Choose a new color for the section
- Tap “Apply” to save your changes
To delete a section:
- Tap the title of the section you’d like to delete
- Tap the title again to show the editor
- Tap on “Delete Section”