18 Playback Controls
Capo offers many controls that you use to interact with the recording while you’re learning songs by ear. These range from the simplest controls (like playing and pausing) all the way to advanced effects like the audio freezer or isolation.
18.1 Play/Pause/Loop
To start or stop audio playback, do one of the following:
- Click the playback toolbar button
- Press space on your keyboard


To start audio playback:
- Tap the play (or loop) button that appears to the right of the position display
To stop audio playback:
- Tap the pause button that appears to the right of the position display
18.2 Changing Playback Speed
To change the playback speed:
- Click the tempo item in the toolbar to reveal the speed controls popover
- Change the slider, or press the reset button to restore the original speed
You can also control the speed using the default keyboard bindings. Press ↑ or ↓ to change between the preset speeds, and press ⇧↑ or ⇧↓ to change speed in 1% increments.
To change the playback speed:
- Use the slider in the SPEED control strip
18.3 The Transcription Playhead
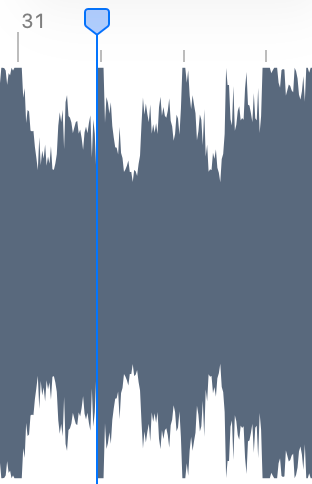
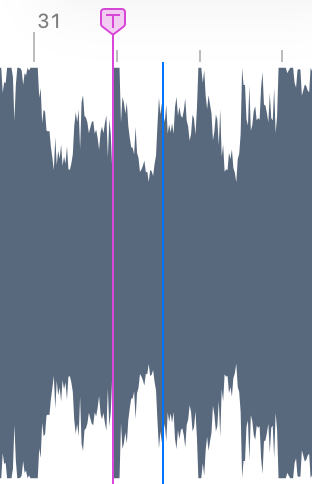
When enabled, the playhead changes from blue to pink (Figure 18.2). When the song starts playing, the pink transcription playhead stays put and the blue playhead moves forwards to indicate where you are listening in the song. When you stop and re-start playback, you always jump back to the pink line where you placed it.
To enable the transcription playhead, do one of the following:
- Click the transcription playhead item in the toolbar
- Press ⌘T on your keyboard
To enable the transcription playhead, do one of the following:
- Tap the transcription playhead item in the PLAYBACK control strip
- Press ⌘T on an attached keyboard
18.4 Regions and Looping
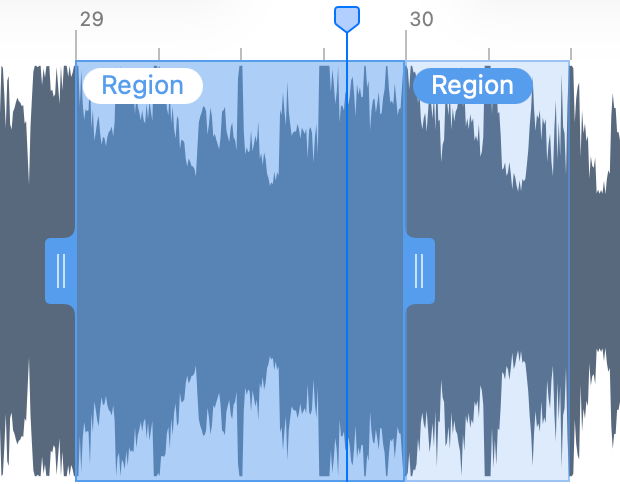
To hear a region loop, you need to activate it first. Click the region on your Mac, or tap it on your iOS device. Active regions appear more saturated with two handles on either side—drag those handles to adjust the loop boundaries.
18.4.1 Call & Response Mode
To enable Call & Response Mode
- If no region is selected, select one to make it active
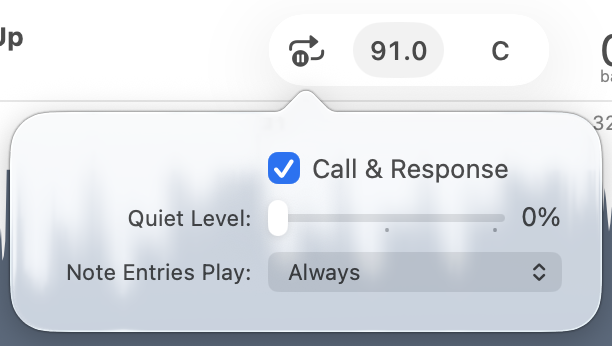
- Click on the loop playback button (Figure 18.1 (b)), and hold the button on your mouse or trackpad until a popover appears
- Click the Call & Response checkbox to toggle it on
18.5 Transposing The Song
To change the song’s key:
- Click the toolbar item that shows the song’s current key, and a popover appears
- Adjust the slider up or down to raise or lower the key in one semitone increments
- Notice how all the chords change to reflect the new key
You can also press ⌘↑ and ⌘↓ to adjust the key using your keyboard.
To change the song’s key:
- Adjust the slider in the Key Control Strip in one semitone increments
If Capo detected the wrong key, then you won’t see the correctly transposed key in the toolbar or control strip slider. You can fix this by overriding the detected key.
18.6 Fine-Tuning Pitch
If you frequently work with older recordings, or your instrument can’t be tuned to match the recording, then you can use Capo’s pitch adjustment to fine-tune the recording so it sounds correct.
The pitch of playback is adjusted in cents (1/100th of a semitone), and pitch can be changed by up to a full semitone up or down.
To fine-tune the song’s pitch:
- Click the pitch toolbar item, and a popover appears
- Adjust the slider up or down to raise or lower the pitch
The Pitch control is not included in the default set of toolbar items, so you’ll have to customize your toolbar to add it first.
To fine-tune the song’s pitch:
- Adjust the slider in the Pitch Control Strip
When you adjust a recording to be out-of-tune against the reference pitch of A=440Hz, Capo’s note entries and chord entries will all sound out of tune when you click on them.
18.7 The Audio Freezer
Capo can “freeze” a moment of the song in time, allowing you to hear whatever notes are playing for as long as you’d like.
To activate the audio freezer, do one of the following in the PRACTICE or TABBING song view:
- Click and drag the playhead in the timeline area
- If you added it to the toolbar, click the freezer item
To activate the audio freezer, do one of the following in the PRACTICE song view:
- While the song is playing, grab the waveform and hold it still
- If the song is stopped, use two fingers to scroll the waveform
You can also create a custom keyboard shortcut or MIDI trigger to activate the audio freezer.
18.8 The Metronome
In the Metronome and Count-in settings, you can toggle a click track that will play in time with the recording using Capo’s detected beat locations. When enabled, your chosen Sound will play along with every beat to help you keep time.
To show the Metronome and Count-In settings:
- Click the metronome icon in the toolbar
To show the Metronome and Count-In settings:
- Tap the metronome (or count-in) icon in the Playback Control Strip
18.8.1 Count-In
When the Metronome is enabled, you can choose a Count-In duration of 1, 2, or 4 bars. When the playhead is located at the start of the bar, Capo will count exactly the same number of beats. But when the playhead is located somewhere in the middle of the bar, you will hear fewer beats counted. For example, if there are 4 beats in a bar, and you set count-in to 1 bar, you will get the following behaviour:
- On beat 1: You will hear 4 clicks before playback starts
- On beat 2: You will hear 1 click before playback starts
- On beat 3: You will hear 2 clicks before playback starts
- On beat 4: You will hear 3 clicks before playback starts
If you instead set the count-in duration to 2 bars, then you’d get 4 more beats.
18.9 Isolation
Capo’s isolation effect lets you solo or mute instruments in a stereo mix. Learn more about this in using isolation.
To show the isolation controls:
- Tap the isolation icon in the toolbar—it looks like a little explosion
To show the isolation controls:
- Tap the isolation icon in the Playback Control Strip—it looks like a pitchfork
18.10 The Mixer
The Mixer gives you controls for adjusting the playback volume of the song, the chords (i.e., the sound played when you select a chord), and the metronome.
To show the mixer controls:
- Tap the mixer icon in the toolbar
The mixer isn’t included in the default set of toolbar controls, but you can add it by customizing the toolbar.
To show the mixer controls:
- Tap the mixer icon in the Playback Control Strip.
If you changed the system-wide control tint color on your Mac, the button is filled to match this setting.↩︎